So, we finished off the last time with Kermie cheering because you found the studs behind your drywall. (here is that post with supplies, part 1) You did right? Found the studs? It felt good didn't it? I know I'm always excited when I find them....especially in this house. It seems someone it slapped together with scraps from....wherever! That's kind of fitting though because it's what I like to do and in the end it works!! It has been here since the 1940's. lol (of course this method isn't for everyone...)
 |
| haha! Who's been here?? A bit random but, it's funny and kinda fits...lol |
Anyhow, now that you've found those studs you need to figure out where to put the other piece of 1X4. This will be going on the wall under the back side of the shelf to support it. SO! Here is where the step ladder comes in handy. Unless you're really tall. You need to decide where you want this on the wall. I put mine 2 feet from the ceiling right in the corner. Measure that far down from the ceiling and draw a line.
Now you're going to need your level.
Luckily, for me, I have a 4 foot long one (DIY Dad sure is handy!) but, a shorter one will work. Draw a line that crosses each stud. This line doesn't need to be as long as the shelf. You can make a small mark on each stud. Just make sure that if you were to draw an imaginary line across the marks it would be level line from one end to the other. HOWEVER, once the shelf it up you won't see it anyway.
Put the 1X4 against the wall with the top even with the line you just drew. Put two screws in at each stud. Just to make ease your mind, put your level on the top of that board and see the little bubble resting peacefully between the two lines. Feels good doesn't it?!? You know, because it IS level!! Right?!?
Celebrate.
I'm serious. You're doing AWESOME if you've come this far and not given up and things are level!
Fantastic job!!

Now for more holes!! The hooks!
These ones can go in the ceiling or the wall. The wall would probably be best because (if your house is normal, like mine isn't) there is a sill plate that runs around the top of the room. This is what the ceiling joists are sitting on. Again, I have no idea what is going on behind my walls and frankly I'm a little scared to take any of the drywall down to find out. I just had to do some guessing and much drilling to find something for the hooks to dig into. This is a big part of the reason why I've only got two wire ropes holding up the shelf and not three.
Ok, enough chit chat; on with our task!
Find your hooks. Put one into the wall about an inch from the corner, well, about an inch toward the middle of where your shelf will be (or wherever the edge of your shelf will be) and push the end into the wall and start turning. It will take a bit of effort. Leeeannnn into it and soon you will be through the drywall and digging into the wood. You'll know because it gets harder to turn. Make sure that there is enough room between where you start the hole and the wall so that you can turn the screw. I put mine in at an angle, I've just always been taught that this holds better. I'm sure there's some science behind it but, I don't know what it is and I've never had anything screwed in this way give me trouble.
Now measure 4 feet (if that's how long your shelf is going to be) from the wall and put the other hook in the same way. Again about an inch less than the length of the shelf away just to keep things symmetrical and aesthetically pleasing. If you are adding another (and if you shelf is more than 4 feet I recommend it) measure half way and put the hook in there.
 |
| when I get my new phone/camera parts I'll make new pics too! |
Now remember the wire ropes that you made a loop in one end? The ones with the crimps and hammering? Go get them and hang them on the hooks.
This next step you'll want to make sure that you either have an assistant or have everything together and within arm's length. BOTH would be even better. This is why I like the step ladder with a "paint shelf", you can put your "stuff" there. Of course this could be an opportunity to buy yourself a tool belt! lol.
The first one of these is going to be the most work and trickiest. You've gotta be sure and hold your tongue the right way or it'll never work....

Besides your tongue you're going to need the wire rope clips, a wrench that fits the nuts on the clips and a level (a smaller one will be better here). Now, put the back edge of the shelf (not the one with the 1X4 attached and holes) on top of the piece of 1X4 that you just attached to the wall. Put your level on the shelf with one end towards the wall where its going to be mounted and one end towards the front edge of the shelf. Next stick two of the clips onto one of the wire ropes then thread it DOWN through one of the holes that you drilled (this is why the drill bit needed to be bigger around than the wire rope). Pull it all the way through and push the shelf up until the level tells you that the shelf is level then thread the rope UP through the other hole and back through the clips.
Check your level again. I left my shelf a little high in the front (very little, just so things don't roll off if I ever decide to put anything roll-y up there)
Now tighten the nuts on the clip and then.....you guessed it! Check your level one more time.
Your shelf is now up. Now to make sure it can hold stuff!! Also, if you were lucky enough to have a helper you can free them now (if you want!). Maybe they'll make you some dinner...? Mine went back to playing computer games....after I screwed up the first time I tried this so, I did the final hanging by myself. That is why I am positive that you can do it too! I just put the shelf on my shoulder and bent my knees until it was at the right height.
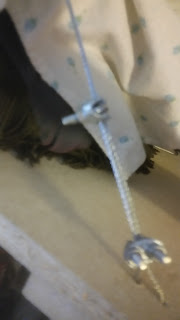  |
| two clips on each rope, be mindful of where the bolts are going, you don't want them stabbing anyone.... |
Add the rest of your wire ropes the same way. These should be easier because you don't have to hold the shelf up and thread wire through holes . I had A LOT of concentration tongue going on and no cursing....lol, ok. There was cursing! Not as much as I expected though.

One last step. Take a few of those screws and put them into the back of the shelf on and angle through the 1X4 supporting the back of the shelf and towards the wall.
That's it. You're done! Unless you want to put up a curtain around the shelf. Then you could get fancy like I did and get some thumb tacks and unused blankets/towels/pillow cases and hang them from the ceiling OR you could wait until I'm at the point where I'm ready to decide what fabric I'm using for curtains and write a post on how I hung them. I'll post the link **here** when I do.
It is now time to put everything away. This way next time you need to build/fix/break something or help a friend do the same (because you're a DIY-er noe!) you'll know where everything is OR if you've borrowed it give it back. This is best done in a timely manner. That way you'll be more likely to be able to borrow something again. You may be tempted to leave everything out. I know I always am because I get excited after every project and want to move right on to the next. This is because I've accomplished something and want to keep that "high" (it's addicting! You've started down a dangerous path here! lol). I've learned though, that life doesn't work that way. You have to put everything away get back to the day to day and live. Carefully plan your next steps then DIG IN again. Tripping over all of that clutter until that time comes will just get annoying and depressing the longer its there
....unless of course this is why you've just built this shelf...? Then, put it there. Yay!!
Once you've put everything away and/or returned it sit down where you can see the shelf and celebrate. You've done it! Great work! Bask in the Glory of a job well done!! All the owies were worth it weren't they?
 |
| WAHOO!! Project complete!! |
I'd love to see your finished product and hear how you managed.
As my room renovation progresses I will post more pictures and make more posts. I've got all kinds of projects planned. The next was going to be turning my long low dresser into a not so long dresser. I've since learned that it belongs to my sister and she'd like to keep it as is...so, now I think I'll work on the work table/desk platform. that we'll be sleeping under. I'm quite excited because I'll be incorporating my BRAND NEW Himalayan Salt Lamp and my nearly new IKEA corner shelf. I love this shelf and only got to use it for a short while before I moved up to Northern Alberta for work. It's been collecting dust and, no doubt dents for ....8 years....? Oh gosh. That's a long time! Where did it go?
Until next time! Stay safe. Have fun. Live.
 |
| current state, when it's finished I'll put that picture here too |

No comments:
Post a Comment
Here is where you can lemme know what you think or ask me any questions that you may have or share something that you think me or my readers need to see.